Post Monsoon Roof Inspection: Essential Steps for Arizona Homeowners
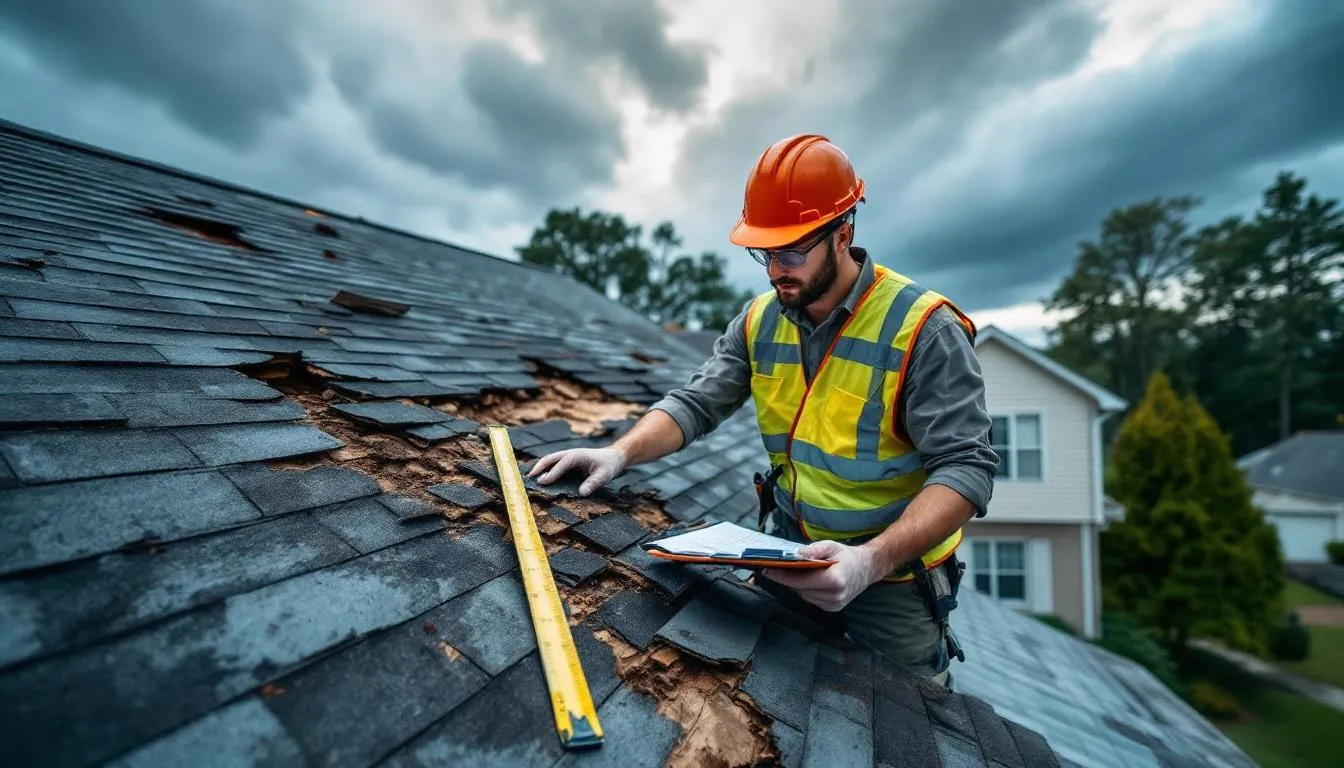
Arizona’s monsoon season transforms the desert landscape with dramatic storms that can unleash years of rainfall in just hours. While these storms bring much-needed moisture, they also subject roofs to extreme conditions that can cause significant damage. For homeowners across Arizona and New Mexico, conducting a thorough post monsoon roof inspection isn’t just recommended—it’s essential for protecting your investment and ensuring your family’s safety.
The combination of high winds, dust storms, heavy rainfall, and debris makes Arizona’s monsoon season particularly challenging for roofing systems. From missing tiles on tile roofs to damaged flashing around roof penetrations, storm damage can quickly escalate from minor issues to costly repairs if left unaddressed. This comprehensive guide will walk you through everything you need to know about conducting effective post-storm assessments while prioritizing safety and maximizing your insurance claim potential.
Why Post Monsoon Roof Inspections Are Critical
Arizona’s monsoon season, spanning from June through September, delivers nearly 50% of the state’s annual rainfall in just 3-4 months. This concentrated weather pattern creates unique challenges that make post monsoon roof inspection absolutely critical for homeowners throughout the region.
During storm season, monsoon winds can exceed 60 mph, creating powerful forces that test every component of your roofing system. These strong winds don’t just remove loose materials—they create pressure differentials that can lift shingles, displace tiles, and bend metal flashing around critical areas like vents and skylights. The roofing industry has documented that storm damage often begins with seemingly minor issues that compound rapidly if not addressed promptly.
Early detection through systematic roof inspections prevents minor damage from escalating into complete roof failure during future storms. A small leak that goes unnoticed can lead to moisture buildup, compromising the structural integrity of your roof deck and potentially creating health hazards through mold growth. Quality roofing professionals emphasize that addressing damage within the first 72 hours after a storm can prevent repairs from escalating into full roof replacement projects.
Insurance companies require timely damage reporting, typically within 30-60 days of storm events, making immediate post-storm assessment crucial for claim validity. Many homeowners discover too late that delayed reporting can result in claim denials, leaving them responsible for expensive repairs. Professional roofer assessments provide the documentation needed to support your insurance claim and ensure you receive appropriate coverage for storm damage.
Post-storm inspections also help maintain roof warranties and prevent coverage disputes with manufacturers. Most roofing materials come with warranties that require regular maintenance and prompt repair of storm damage. Failure to address issues quickly can void these warranties, leaving homeowners without recourse for future problems.
What to Look for During Post Monsoon Inspections
Conducting a thorough post monsoon roof inspection requires understanding what types of damage to expect and where to look for problems. Arizona’s unique weather patterns create specific damage signatures that trained eyes can identify before they become major issues.
The inspection process should encompass both exterior and interior assessments, with particular attention to areas where water typically finds its way into the roofing system. While some damage is immediately visible from the ground, many critical issues require closer examination or professional assessment to identify properly.
Exterior Damage Assessment
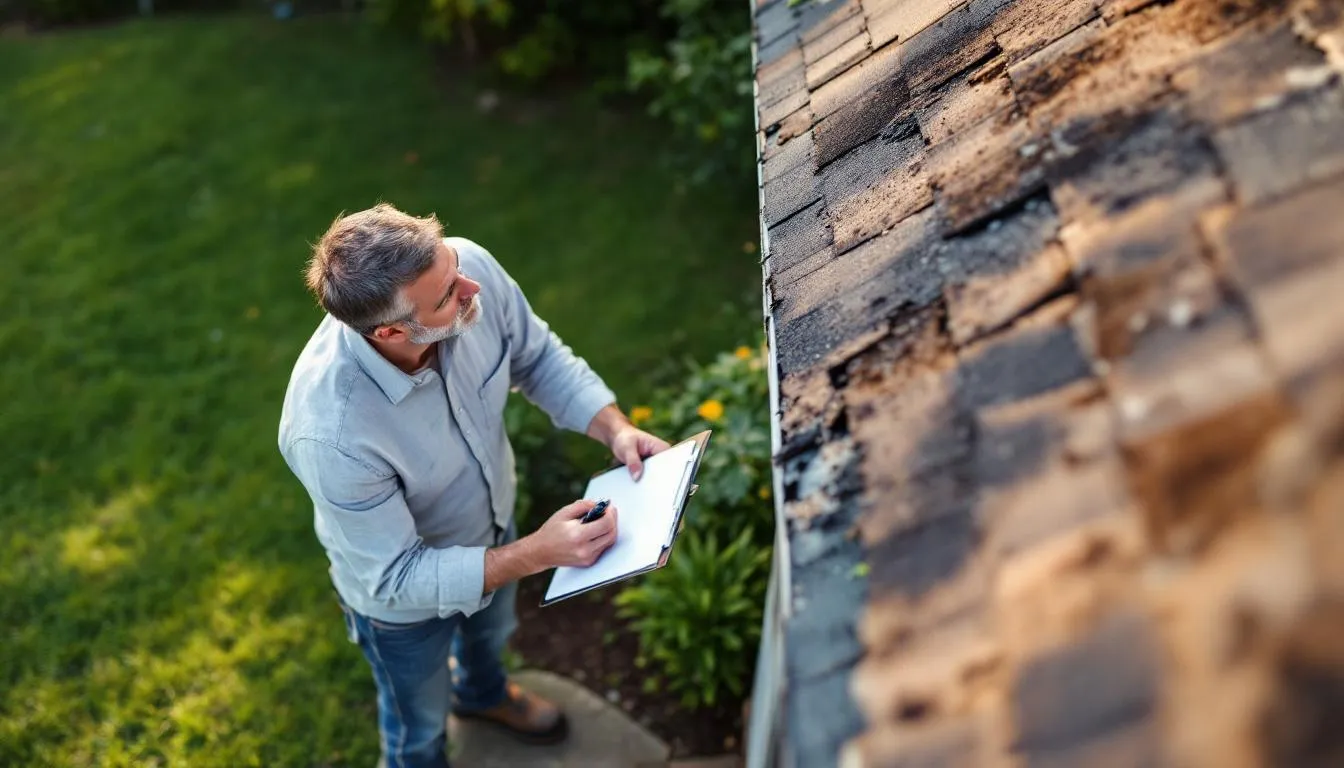
Begin your exterior assessment from the ground using binoculars to safely examine your roof surface. Look for missing, cracked, or curled shingles that expose the underlying roof deck to moisture infiltration. On asphalt shingles, pay special attention to granule loss, which often appears as bare spots and typically accumulates in gutters and downspouts after wind damage.
For tile roofing systems common throughout Arizona, inspect for visible cracks, displaced tiles, or missing pieces that compromise the roof’s weather barrier. Tile roofs are particularly susceptible to impact damage from debris carried by monsoon winds, and even small cracks can allow water penetration that leads to underlayment failure.
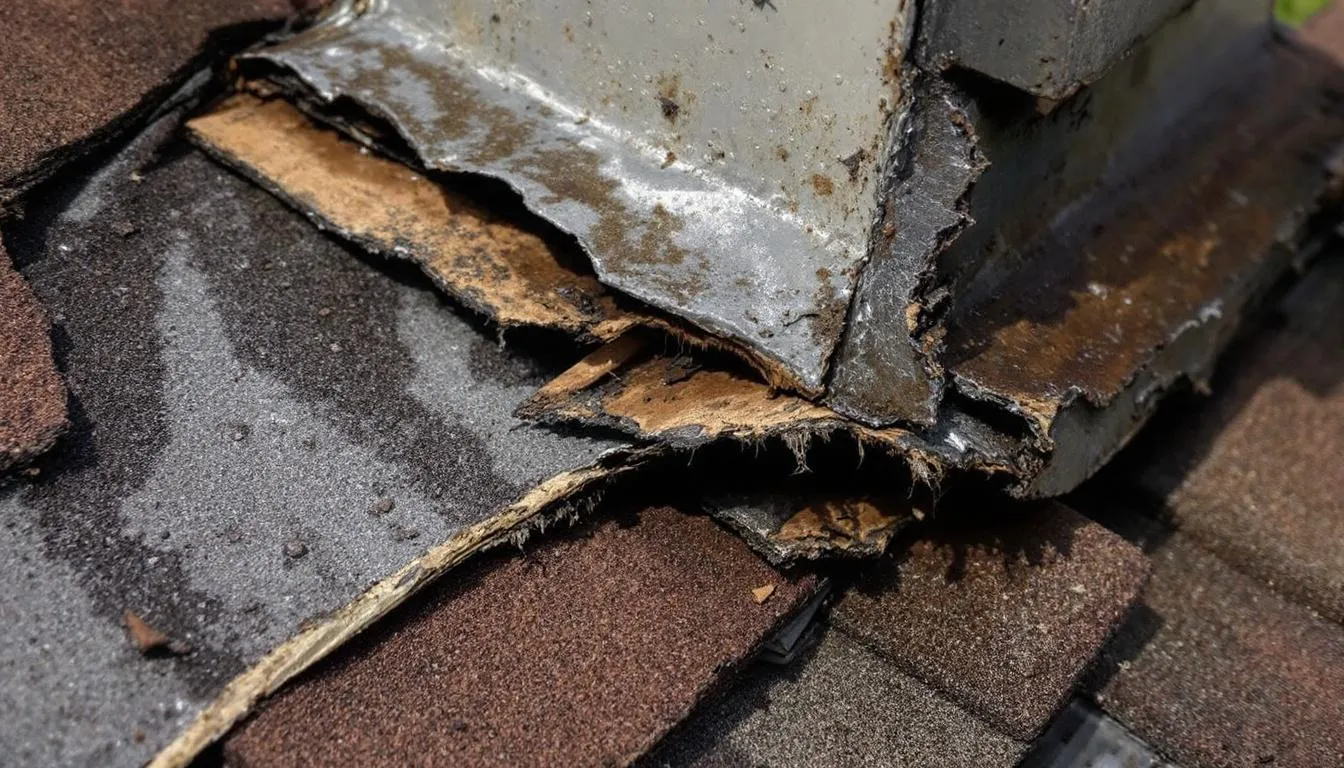
Examine all flashing around chimneys, vents, and other roof penetrations for signs of lifting, bending, or separation. Metal flashing serves as the primary water barrier at these critical transition points, and wind damage to these components is a leading cause of post-storm leaks. Look for gaps, loose edges, or areas where sealants have failed or been blown away.
Check gutters and downspouts for damage, displacement, or debris accumulation. Clogged gutters can cause water backup that stresses roof edges and leads to overflow damage. Bent or damaged gutters may indicate impact from debris and require immediate attention to maintain proper drainage. The accumulation of other debris like branches, leaves, and roofing materials in gutters provides clear evidence of storm impact and potential roof damage.
Inspect your roof’s overall profile for sagging or visible structural deformation, which may indicate serious damage requiring immediate professional intervention. Even subtle changes in roof lines can signal underlying structural issues that compromise the entire roofing system’s integrity.
Interior Damage Indicators
Interior inspection during or immediately after rain provides valuable real-time information about your roof’s performance under stress. Look for water stains on ceilings, particularly around light fixtures, ceiling fans, and other roof penetrations where leaks commonly develop.
Examine walls near roof lines for damp spots, discoloration, or signs of water infiltration. Pay particular attention to areas below valleys, around chimneys, and near roof edges where water concentration makes damage more likely. Fresh water stains often appear darker than existing marks and may indicate new damage from recent storms.
Check attic spaces thoroughly for signs of moisture intrusion, including wet insulation, water marks on rafters, or evidence of active dripping. A musty odor in upper floor areas often indicates hidden moisture problems that require immediate attention to prevent mold growth and further damage.
Monitor for peeling paint or wallpaper in upper floor rooms, as these signs often indicate chronic moisture infiltration from roof damage. Increased humidity levels or condensation on windows in upper floors can also signal roof problems that compromise your home’s envelope.
Professional vs DIY Inspection Guidelines
Understanding the boundaries between safe DIY assessment and professional inspection requirements protects both your safety and your roof investment. While homeowners can safely conduct certain types of evaluations, some aspects of post monsoon roof inspection require professional expertise and equipment.
The roofing industry reports that falls cause over 40% of construction-related fatalities, making safety the primary consideration when deciding whether to inspect your roof yourself. Professional contractors have the training, equipment, and insurance necessary to safely access roofs under challenging post-storm conditions.
Safe DIY Assessment Tasks
Homeowners can safely conduct comprehensive ground-level visual inspections using binoculars to examine roof surfaces, gutters, and obvious damage indicators. This approach allows you to identify missing shingles, displaced tiles, and visible flashing damage without exposing yourself to fall hazards.
Interior ceiling and wall examination represents another safe DIY task that provides valuable information about roof performance. During active rainfall, you can trace leak patterns and identify moisture entry points that guide professional repair efforts. Document any signs of water damage with photographs and note the location and severity of problems.
Basic gutter and downspout debris removal falls within safe DIY parameters, provided you use proper ladder safety and avoid overreaching. Clear visible debris from accessible gutters and check that downspouts drain freely away from your foundation. This simple maintenance can prevent water backup and additional damage.
Photograph visible damage from safe vantage points to document storm impact for insurance purposes. Take wide-angle shots showing overall roof condition and close-up images of specific damage areas when safely accessible from the ground or through upper-story windows.
Attic inspection provides safe access to check for leaks, moisture, or structural issues without climbing on the roof surface. Look for daylight coming through the roof deck, wet insulation, or water stains on framing members that indicate active leaks requiring professional attention.
When to Call Professionals Immediately
Any visible structural damage, including sagging roof sections, bent rafters, or compromised supports, requires immediate professional assessment. These conditions pose safety risks and may indicate damage that affects your home’s structural integrity.
Active leaks or significant water infiltration during or after storms demand professional intervention to prevent further damage. Temporary measures may be necessary, but proper repairs require professional expertise to ensure lasting solutions and warranty coverage.
Electrical components near roof areas affected by storm damage present serious safety hazards that only qualified professionals should address. Water and electricity create dangerous combinations that can result in serious injury or death.
Extensive shingle damage covering more than 25% of your roof surface typically indicates impact severe enough to compromise the entire roofing system. Professional assessment helps determine whether repair or roof replacement provides the most cost-effective solution.
Compromised flashing around critical penetrations like chimneys, skylights, or complex roof intersections requires professional repair to ensure proper waterproofing. Improper flashing repair often leads to recurring leaks and more extensive damage over time.
Timing Your Post Monsoon Inspection
Proper timing for post monsoon roof inspection balances the need for immediate damage assessment with safety considerations and practical access limitations. Understanding optimal inspection windows helps ensure thorough evaluation while minimizing risks to both people and property.
Schedule your initial inspection within 48-72 hours after storm systems completely pass through your area. This timeframe allows standing water to drain while still providing early detection of damage before additional weather events compound existing problems. Insurance companies often require damage reporting within specific timeframes, making prompt inspection essential for claim validity.
Allow at least 24 hours for standing water to drain from roof surfaces before attempting any roof-level access. Wet surfaces create significant slip hazards, and additional weight from standing water can stress damaged roofing components beyond their safe load limits.
Plan follow-up inspections after each major storm event throughout the monsoon season, as cumulative damage often develops gradually. Small issues identified early can be addressed before they evolve into major problems requiring extensive repairs or roof replacement.
Schedule a comprehensive end-of-season inspection by early October, before winter weather patterns begin affecting the region. This final assessment provides opportunity to address any damage discovered during the storm season and prepare your roofing system for the upcoming year.
Document inspection dates and findings meticulously for insurance and warranty purposes. Consistent documentation demonstrates responsible maintenance and can support claims for future damage or warranty issues.
Documentation and Insurance Considerations
Proper documentation during your post monsoon roof inspection can make the difference between a successful insurance claim and a costly out-of-pocket repair expense. Insurance companies require specific types of evidence to validate storm damage claims, and understanding these requirements helps ensure you collect the right information.
The key to successful insurance claim documentation lies in thoroughness and timeliness. Insurance adjusters need clear evidence that damage resulted from covered storm events rather than normal wear and maintenance issues. Professional-quality documentation strengthens your position and expedites the claims process.
Proper Damage Documentation
Take comprehensive wide-angle photographs showing overall roof condition before focusing on specific damage areas. These overview shots establish the scope of damage and provide context for detailed close-up images. Include multiple angles and perspectives to give adjusters a complete picture of storm impact.
Ensure all photographs include date stamps and GPS coordinates when possible, as this information helps establish the timing relationship between storm events and damage discovery. Many smartphone cameras automatically embed this metadata, but verify that these features are enabled before beginning documentation.
Photograph debris impact points and surrounding undamaged areas for comparison purposes. This contrast helps demonstrate that damage resulted from storm impact rather than gradual deterioration. Include images of debris found on your roof or in gutters as evidence of storm activity.
Document serial numbers and manufacturer information for damaged roofing materials when safely accessible. This information helps insurance adjusters and contractors determine appropriate replacement materials and costs for repair estimates.
Maintain detailed written notes describing storm conditions, timing, and the discovery of damage. Include information about wind speeds, rainfall intensity, and the duration of storm events affecting your area. Weather service reports can provide official documentation to support your observations.
Emergency Repairs and Temporary Protection
When storm damage creates immediate threats to your property, emergency repairs and temporary protection measures become essential to prevent further damage while awaiting professional restoration. Understanding proper emergency response techniques can save thousands of dollars in additional damage while keeping your family safe.
The goal of emergency repairs isn’t permanent restoration but rather damage control until professional repairs can be completed. Insurance policies typically cover reasonable emergency protection measures, making proper documentation of these temporary solutions important for claim reimbursement.
Immediate Damage Control Measures
Install emergency tarps over damaged roof areas using proper anchoring techniques that won’t cause additional damage to your roofing system. Use weighted anchors rather than nails or screws when possible, and ensure tarps extend well beyond damaged areas to direct water away from vulnerable spots.
Clear debris from gutters and drainage systems immediately to prevent water backup that can cause additional damage to roof edges, fascia, and foundation areas. Blocked gutters can create ice dams in cooler weather and contribute to overflow damage during future storms.
Place buckets and protective coverings strategically for active interior leaks, but remember that these measures only control damage rather than solving the underlying problem. Position containers to catch dripping water and protect flooring, furniture, and personal belongings from water damage.
Remove loose or damaged roofing materials that pose safety hazards to people or property below. Secure the area around your home and notify family members about potential falling debris risks until professional removal can be arranged.
Apply temporary sealants to secure loose flashing around roof penetrations, but understand that these measures require professional follow-up for permanent repair. Emergency sealants can prevent immediate water intrusion but aren’t designed for long-term protection against weather exposure.
Seasonal Maintenance Planning After Inspections
Your post monsoon roof inspection results should inform a comprehensive seasonal maintenance plan that addresses identified issues while preparing your roofing system for future storms. Strategic planning helps spread repair costs over time while ensuring your roof remains in good condition throughout the year.
Effective maintenance planning considers both immediate repair needs and long-term improvement opportunities that enhance your roof’s storm resistance. Quality roofing professionals recommend developing a multi-year maintenance schedule that addresses different components during optimal weather windows.
October-December Repair Window
Schedule major repairs during the optimal weather conditions available in fall months when temperatures moderate and precipitation decreases. This window provides ideal conditions for most roofing work while allowing completion before winter temperature fluctuations stress roofing materials.
Address structural issues immediately, before winter temperature changes create additional stress on damaged components. Thermal expansion and contraction can worsen existing damage and create new problems if repairs are delayed beyond the fall repair window.
Replace damaged shingles and tiles before freeze-thaw cycles begin affecting the region, as these weather patterns can accelerate deterioration of compromised materials. Even minor damage can progress rapidly under thermal stress, making prompt replacement more cost-effective than delayed repairs.
Complete flashing repairs and sealant applications while moderate temperatures ensure proper curing and adhesion. Many sealants and roofing cements require specific temperature ranges for optimal performance, making fall installation preferable to emergency winter repairs.
Plan major roof replacement projects for completion before the next monsoon season begins. Full replacement projects require extended periods of good weather and are best completed during the stable conditions available from October through March.
Preparing for Next Monsoon Season
Implement preventive measures based on damage patterns identified during your post monsoon roof inspection and current season observations. Areas that showed vulnerability during recent storms may benefit from upgraded materials or enhanced protection measures.
Consider upgrading vulnerable components with more storm-resistant alternatives when replacement becomes necessary. Modern roofing materials often provide better wind resistance and impact protection than older products, offering improved performance during future storms.
Schedule pre-monsoon inspections during April and May to verify the effectiveness of repairs and identify any issues that developed during winter months. These proactive steps help ensure your roofing system enters storm season in optimal condition.
Establish relationships with trusted contractors before emergency situations arise, as quality professionals often have limited availability during peak storm seasons. Having pre-established service agreements can ensure priority scheduling when urgent repairs become necessary.
Develop a comprehensive emergency plan that includes contact information for contractors, insurance representatives, and emergency services. Keep important documents easily accessible and maintain an updated inventory of your home’s contents for insurance purposes.
Understanding the importance of post monsoon roof inspection goes beyond simply identifying damage—it represents a proactive approach to home maintenance that protects your investment while ensuring your family’s safety. By following the systematic approach outlined in this guide, Arizona homeowners can navigate the challenges of storm season with confidence, knowing they’re taking the right steps to maintain their roofing system’s integrity.
Remember that safety should always be your top priority when conducting any roof-related assessment. While DIY inspection techniques can identify many issues, professional expertise remains essential for comprehensive evaluation and safe repair of storm damage. The cost of professional inspection and repair services represents a small investment compared to the potential expense of ignoring problems until they become emergencies.
As climate patterns continue to evolve and storm intensities potentially increase, the importance of systematic post-storm assessment will only grow. Homeowners who develop consistent inspection and maintenance routines position themselves to weather future storms with minimal disruption and expense. Take the time now to implement these practices, and your roof will provide reliable protection for years to come.
Why Choose Reimagine Roofing
-
Free Post-Monsoon Roof Inspection – We’ll identify visible and hidden damage.
-
Fast Quote Tool – Get a detailed repair or replacement estimate in less than 24 hours.
-
Experienced Arizona Roofing Experts – We know monsoon damage patterns inside and out.
📞 Call us today to book your Free Roof Inspection or use our online Fast Quote tool to get started — because waiting could turn a small repair into a big problem.
FAQ
How long should I wait after monsoon storms end before inspecting my roof?
Wait 24-48 hours for standing water to drain and weather conditions to stabilize, but complete your inspection within 72 hours to meet insurance reporting requirements and prevent further damage. This timing balances safety concerns with the need for prompt damage assessment.
Can I safely inspect my roof myself, or do I need a professional?
You can safely conduct ground-level visual inspections and check interior areas, but any actual roof access should be left to professionals due to safety risks – falls cause over 40% of construction industry fatalities. Use binoculars for roof surface examination and focus on interior assessments you can perform safely.
What if I find damage but my insurance claim is denied?
Document everything thoroughly, obtain independent professional assessments, and consider hiring a public adjuster if significant damage is disputed – many denials result from insufficient documentation rather than actual coverage issues. Keep detailed records of all communications and consider appealing the decision with additional evidence.
How much damage is considered normal wear versus storm damage?
Storm damage typically shows distinct impact patterns, sudden onset, and affects multiple roof components simultaneously, while normal wear appears gradually over time – professional inspectors can distinguish between the two for insurance purposes. Fresh damage often appears different in color or texture compared to aged wear patterns.
Should I make temporary repairs before the insurance adjuster arrives?
Yes, you have a duty to prevent further damage, but photograph everything before making any changes and keep receipts for materials – emergency repairs are typically covered under most policies. Focus on preventing additional damage rather than permanent fixes, and document all temporary measures thoroughly.